
Wood finishing basics: A no-drama guide to choosing, applying, and loving your finish
Key Takeaways
Good wood finishing basics come down to preparation, restraint, and choosing a finish that suits the job rather than the label on the tin.
- Match the finish to the wood, use, and desired appearance.
- Sand evenly, remove contamination, and test on scrap.
- Apply several thin coats instead of one thick coat.
- Allow enough time for drying and curing.
- Treat fumes, solvents, and oily rags as genuine safety concerns.
Start with the job, not the jar
A finish is not merely decoration added after the real woodworking is done. It changes how the surface feels, how the colour develops, and how well the piece copes with handling, moisture, marks, and time. We get calmer results when we decide what the project needs before opening a tin.
The best choice is rarely the most impressive-sounding product. A small indoor shelf, a dining table, and a decorative box all ask different things of their finish. We can save ourselves a great deal of sanding by making that decision early.
What a finish actually does for wood
Wood finish forms a protective or decorative layer, or soaks into the timber to alter its feel and appearance. Depending on the type, it may reduce moisture exchange, make cleaning easier, deepen the grain, add colour, or provide a smoother surface for daily use. No finish makes timber indestructible, though, and a thin film cannot compensate for a badly prepared surface.
We should also think about touch. Some finishes feel close to bare wood, while others create a more noticeable film. That difference matters on a handrail, a benchtop, or a small box we will handle often. The surface tells the story of every shortcut beneath it, so preparation and finish should be treated as one process.
Matching protection to the project
Start with the likely abuse. A table may see water rings, food, heat, and frequent wiping; a wall-mounted cabinet may need little more than protection from dust and occasional contact. Outdoor timber has a separate set of demands, including sunlight and weather, so an indoor product is not automatically suitable simply because it looks attractive in the tin.
We can make the decision more plainly by asking three questions: Will the piece get wet? Will it be touched or scrubbed often? Does the finish need to disappear visually? Those answers narrow the field faster than browsing every option at the hardware shop.
Choosing between appearance and durability
A very durable finish may create a more visible film, while a subtle finish may need gentler treatment or more regular maintenance. That is not a failure; it is a trade-off. A writing desk that develops a few honest marks can still be a success if its surface was chosen for feel and ease of repair.
We should decide which compromises we can live with. If we want a quiet, natural appearance, we may accept more care. If the project is for a busy household, a little extra sheen and film build may be sensible. There is no universal winner, only a finish that fits the life of the object.
Why “just use polyurethane” is not always the answer
Polyurethane can be useful, but it is not a finishing philosophy. It may be the wrong visual choice for a project where we want a very low-build surface, and it can be unnecessarily elaborate for a lightly handled decorative piece. Application method, sheen, drying time, and repairability still matter.
We also need to consider the timber itself. A finish that looks pleasing on pale ash can make a red-toned wood feel heavier, while a thick film can flatten the tactile quality we liked in the raw board. Rather than reaching for a familiar name, we should compare the job, the wood, and the result we actually want.
Prepare the wood for a finish that behaves
Most finishing trouble begins before the first coat. Scratches, glue spots, greasy fingerprints, and uneven sanding become much easier to see once the surface is wet or glossy. We do not need to pursue perfection for its own sake, but we do need to remove flaws that the finish will magnify.
Preparation is also where patience pays best. A few deliberate checks under angled light can prevent an evening of trying to repair a mark that was visible all along.
Sanding through the grits without getting obsessive
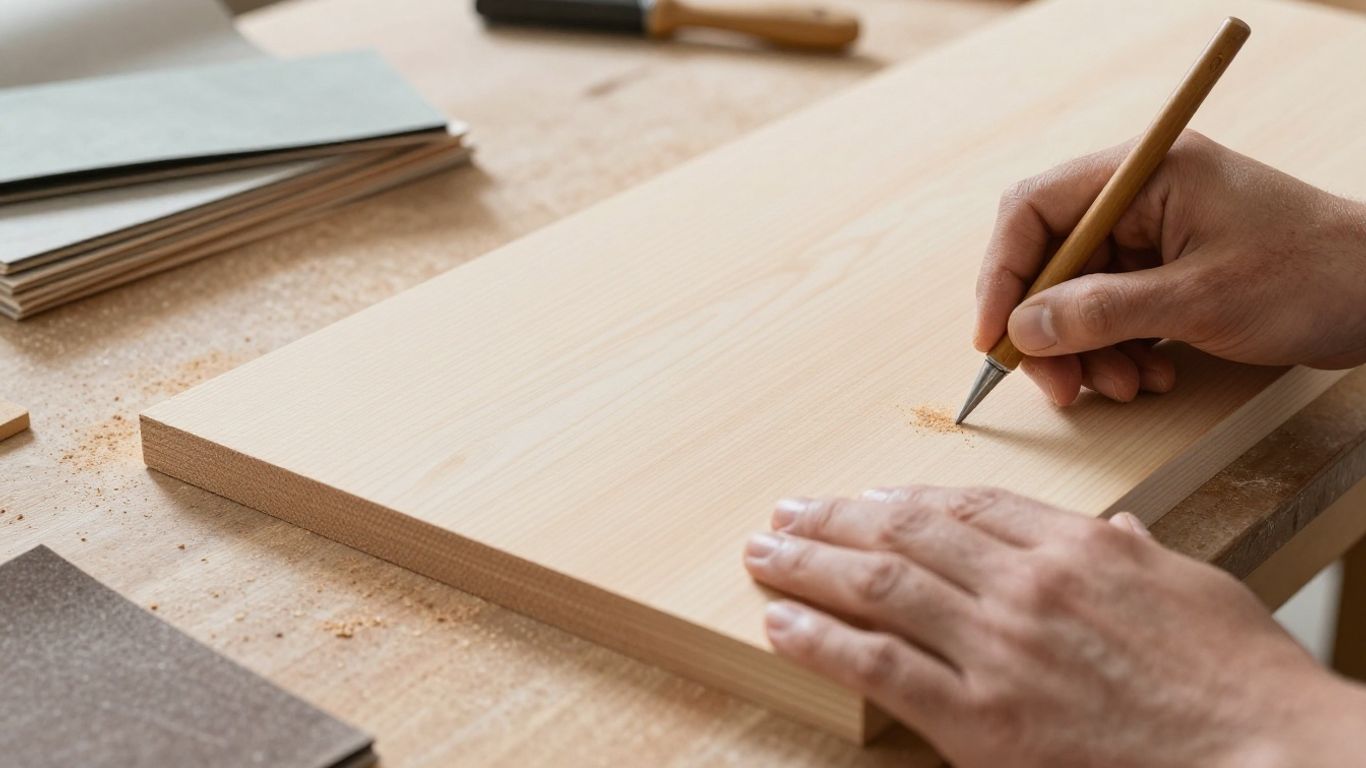
Begin with a grit coarse enough to remove the actual defects, then move through progressively finer grades until the surface looks even. Sand with the grain on visible faces and use a flat block where a flat surface matters. We should not keep sanding indefinitely; once the scratches from the previous grit are gone and the surface suits the finish, further polishing may add little.
A raking light is wonderfully unforgiving. Move it across the board rather than relying on a quick glance from above. If the light reveals a long scratch, keep working that local area rather than sanding the entire project into dust.
Removing dust, grease, and mystery fingerprints
Dust is obvious, but contamination is sneakier. Glue residue, oily hands, wax, and workshop grime can cause fisheyes, uneven colour, or patches where the finish refuses to wet the timber properly. We should vacuum or brush away loose dust, then use a clean method suitable for the finish and timber rather than spreading the grime around with a dirty rag.
Clean hands help more than we like to admit. Before the final wipe, we can inspect edges, corners, and the underside of rails, where dust likes to settle and later drift onto a wet coat. The aim is not laboratory sterility; it is a clean, dry, consistent surface.
Handling dents, scratches, knots, and open pores
Dents may respond to careful moisture and heat, while deep scratches usually need sanding or filling. Knots can absorb finish differently from surrounding grain, and open-pored timbers may remain textured unless we choose to fill those pores. Each defect deserves a treatment suited to its cause, not a generous layer of finish poured over the evidence.
Before filling, we should ask whether the repair will match the timber after colouring. A filler that looks acceptable when dry may stand out once stain or oil changes the surrounding grain. On character timber, some marks are worth retaining; a perfectly blank surface is not always the most convincing one.
Testing on scrap before the furniture gets involved
Scrap is our quiet insurance policy. Use an offcut from the same board, sand it in the same way, and apply the proposed sequence in the same order. This reveals colour, sheen, grain response, and compatibility before the finished project is watching us with wooden disappointment.
The test is most useful when we label what we did. Record the preparation, number of coats, and approximate drying conditions. A small sample cannot predict every outcome, but it can expose a poor choice cheaply and without drama.
Pick the right type of wood finish
There is no single best finish for every project. Oils, water-based products, oil-based products, shellac, lacquer, and wax each create different combinations of colour, film, repairability, and working time. We should compare those traits with the project rather than treating the finish aisle as a personality test.
The table below is a starting map, not a promise. The exact behaviour depends on the product, timber, preparation, and conditions, so a test board remains the final referee.
Oils for a natural look and easy touch-ups
Oil finishes are often chosen when we want the grain to feel close and the application to remain straightforward. They can deepen colour and leave a pleasant tactile surface, although protection and maintenance vary. Some oils build a film; others mainly penetrate, so we should read the instructions rather than assume that every product behaves alike.
They are appealing for small projects because local repairs can be less conspicuous than repairs to a thick film. The trade-off is that a natural-looking surface may not tolerate rough daily use as easily as a tougher built-up coating.
Water-based finishes for clear color and quick drying
Water-based finishes are commonly selected when we want to preserve a lighter timber colour and work through coats without a long wait. They can dry quickly, which is handy in a small workshop, but that speed can make brush marks or lap marks harder to correct while working.
The timber may also react to water in the first coat, raising fine fibres. A light de-nibbing after drying can help, provided we do not rush into aggressive sanding and cut through the coat. Good airflow and a clean workspace still matter even when the product has a mild smell.
Oil-based finishes for warmth and forgiving application
Oil-based finishes can add warmth and often provide a generous working time. That slower pace gives us a chance to lay off marks and keep a wet edge, though it also means the project occupies the workshop for longer. Colour shift should be checked on scrap, especially when the wood is pale or the desired result is very clean.
The label may say “dry” before the coating has reached its final hardness. We should avoid stacking, wrapping, or heavy use until the maker’s guidance allows it. A patient finish is usually kinder than a hurried one.
| Finish family | Typical visual effect | Useful when | Main caution |
|---|---|---|---|
| Oil | Enriched grain and natural feel | Touch-focused pieces and simple refreshes | Protection and maintenance vary |
| Water-based | Relatively clear colour | Pale timber and quicker recoating | Can highlight application marks |
| Oil-based | Warmer tone and flowing application | Projects where working time helps | Colour shift and slower curing |
| Shellac or lacquer | Distinct film and specialised appearance | Controlled workshop applications | Solvent, ventilation, and compatibility concerns |
This comparison helps us choose a direction without pretending that categories behave identically. Once the shortlist is sensible, the sample board decides whether the actual product earns a place on the project.
Shellac, lacquer, and wax for specialized results
Shellac can provide a distinctive film and is useful in some traditional and repair situations. Lacquer can produce a particular look and working rhythm, but it demands careful attention to ventilation, application equipment, and product instructions. Wax is often used for feel or a soft sheen, though it is not a substitute for a durable protective coating where the project will be heavily used.
These finishes reward a little research before we begin. They may interact with earlier coats, and some are less forgiving of casual workshop conditions. When the result matters, compatibility testing is a small price for avoiding a large, sticky surprise.
Apply finish without creating tiny disasters
Application is where good preparation becomes visible. We want an even coat, sensible coverage, and enough time to notice problems while they are still fixable. The mood improves considerably when we stop trying to make one coat do the work of three.
We should set up the piece so we can reach every face without leaning across wet finish. Clean supports, good light, and a place for the brush or rag to rest are humble arrangements, but they prevent heroic contortions.
Brushing, wiping, spraying, and when to use each
Brushing suits many finishes and gives us control over where the material goes. Wiping can create a thinner, quieter coat and is often comfortable on small or shaped parts. Spraying can produce an even surface, but it requires suitable equipment, practice, masking, and careful control of overspray.
The method should match the product and the scale of the piece. A brush is not automatically primitive, and spraying is not automatically superior. We choose the simplest method that can produce the required result safely and consistently.
Building thin coats instead of one heroic blob
Thin coats are easier to control, dry more predictably, and reduce runs. We apply enough to wet the surface, then spread it evenly rather than leaving pools in corners or along edges. Thick coats feel reassuring for about thirty seconds, after which they begin inventing problems.
A useful routine is to work in manageable sections, keep a wet edge, and inspect from several angles before moving on. On vertical surfaces, less material is usually wiser. The finish can build across several coats; the project does not need to win everything in one pass.
Managing drips, bubbles, brush marks, and runs
Most application defects have a simple cause: too much product, too much agitation, an unsuitable brush, or returning to an area after it has started to set. We should watch edges and inside corners closely, because gravity conducts a particularly reliable finishing workshop there.
If a run appears while the coat is still workable, we can gently spread it out. Once the surface begins to tack, further brushing usually makes the mark worse. Put the brush down, let the coat dry, and plan a calm correction rather than wrestling with it.
Sanding lightly between coats
Between coats, light sanding can remove raised fibres and small dust nibs and provide a more even key for the next layer, where the product instructions call for it. We are not trying to remove the previous coat. A few gentle passes with fine abrasive are enough; pressing harder simply creates a new scratch pattern.
After sanding, remove every trace of dust before recoating. We should pay particular attention to edges, as sanding through there is easy. If the surface is already smooth and the instructions do not require sanding, unnecessary abrasion may do more harm than good.
Make the finish look intentional
A successful finish looks considered, even when the timber retains knots, colour variation, and the occasional mark of making. Intentionality comes from choosing a colour and sheen that agree with the wood, then applying them consistently. It does not mean forcing every board to look identical.
We should evaluate the piece in the room where it will live if possible. Workshop lighting can make a warm finish seem ordinary and a glossy one seem restrained; daylight has a habit of telling the truth.
Preventing blotching on pine, cherry, and other tricky woods
Some timbers absorb colour unevenly, producing dark patches beside pale ones. Uneven sanding, end grain, glue residue, and naturally variable pores can all contribute. A compatible conditioner, washcoat, gel product, or a different colouring method may help, but the correct choice depends on the timber and the intended finish.
Testing is especially valuable here. We can compare a few preparation and colour options on the same offcut, then choose the one with the most believable variation. If the wood is naturally lively, trying to make it perfectly uniform may create a less attractive result.
Enhancing grain without turning the piece orange
Warmth can be pleasant, but it can also arrive uninvited. Oil, ambering clear coats, and warm stains may push pale or red-toned timber too far. We should view the sample in daylight and against the surrounding materials, not only under the yellow workshop lamp.
A clear or lightly tinted finish may be enough to bring out the grain. When colour is needed, several restrained steps are easier to control than one strong stain. We can always add a little more; removing excess colour is a much less cheerful operation.
Choosing gloss, satin, or matte sheen
Sheen changes how light moves across a surface and how readily small defects catch the eye. Gloss can look striking but reveals ripples and dust more readily. Satin is often a practical middle ground, while matte can feel quiet and modern but may not suit every product or maintenance plan.
The sheen is also a tactile decision. We should not choose it from a tiny lid sample alone. Rub a test board, view it from several angles, and consider whether fingerprints, reflections, and cleaning marks will bother us in daily use.
Using stain, dye, and clear coat in the right order
Colouring products and clear coats are separate steps, even when a product combines functions. We need to know whether the colourant is water- or solvent-based, whether it must be sealed, and whether the next coat is compatible. The order affects absorption, colour depth, and the final feel.
A sensible sample schedule might compare bare timber, colour alone, and colour under the intended clear coat. We should let each stage dry as directed before judging it. Wet wood is a charming liar.
Drying, curing, and fixing mistakes
A finish can be dry to the touch while remaining soft underneath. Drying describes the surface becoming less wet or tacky; curing is the longer process in which the coating develops its final hardness and resistance. Confusing the two is how fresh projects acquire fingerprints, stacked-board marks, and deeply personal memories.
We should follow the product instructions and allow extra time when the room is cool, humid, poorly ventilated, or the coat was heavy. A calendar is less useful than the actual condition of the surface.
Understanding the difference between dry and cured
A dry surface may accept another coat, but that does not mean it is ready for hard use. Curing can continue after the finish feels smooth, so we should be cautious with clamps, packaging, books, and anything that traps the surface against another material.
When in doubt, test an inconspicuous spot gently rather than pressing a fingernail into the visible face. Patience is particularly valuable with oil-rich products and thick applications, both of which can remain soft longer than expected.
Improving ventilation and controlling dust
Fresh air helps carry away vapours and supports predictable drying, but ventilation should not become a wind tunnel aimed directly at wet finish. Strong drafts can deposit dust, chill the surface, or disturb a smooth film. We want steady air movement and a reasonably clean room.
Before applying a coat, we can let settled dust fall, clean nearby surfaces, and avoid sweeping immediately beside the project. Covering the work loosely after the surface has reached the appropriate stage may help, but sealing in fumes or touching wet finish with a cover creates its own problems.
Repairing streaks, dust nibs, and uneven sheen
Small dust nibs usually need time to harden before they can be levelled gently. Streaks may come from uneven application, an overloaded brush, or returning to a partly set area. Uneven sheen can result from inconsistent film thickness, incomplete mixing, or sanding through one area more than another.
We should identify the cause before reaching for more product. A light sand and another controlled coat may solve a local issue. If the defect runs through several layers, trying to disguise it with extra finish often makes the surface heavier without making it better.
Knowing when to strip, sand back, or call it character
Not every flaw deserves a full rescue. If the finish is sound and the mark is visible only when we conduct an inspection worthy of a museum conservator, we may choose to live with it. If the surface is sticky, badly contaminated, peeling, or uneven across the whole piece, sanding back or stripping may be the more honest route.
We should stop before the repair becomes more damaging than the original mistake. A small imperfection can show that the object was made by people, not emitted by a factory. Character is welcome; a surface that cannot be used is not.
Build a safe and repeatable finishing routine
A calm finishing routine protects more than the project. It protects our lungs, skin, workshop, tools, and future self, who would prefer not to discover a mystery tin leaking beneath a stack of timber. Safety is part of craft rather than an interruption to it.
We can make the routine repeatable by preparing the space before opening the container, reading the label, and keeping only the materials needed for the current coat nearby. Less clutter means fewer mistakes and fewer opportunities for a solvent-soaked rag to lead an adventurous life.
Storing finishes without creating a chemistry experiment
Keep finishes in their original, clearly identified containers and follow the maker’s storage directions. Close lids securely, store products where temperature and ignition guidance allow, and avoid transferring liquids into unlabelled jars. A shelf full of anonymous half-tins is not a finishing system; it is a future guessing game.
We should also check the condition of an old product before using it. Skin, lumps, separation, or an unusual smell may signal that the material is no longer suitable. When the label is missing or the contents are uncertain, disposal through the appropriate local arrangements is safer than creative experimentation.
Handling oily rags and fire risks
Rags used with drying oils can heat as they dry and may present a fire risk when bunched together. We should never leave them crumpled on a bench or in a bin. Follow the product guidance for spreading them flat to dry safely, placing them in a suitable approved container, or disposing of them through the correct waste service.
The wider rule is simple: keep ignition sources away from flammable products and vapours. Do not assume a small amount is harmless. A tidy end-of-session routine is considerably less exciting than discovering that the bin has developed ambitions.
Protecting yourself from fumes and skin contact
Read the label for ventilation, protective equipment, and first-aid directions before starting. Avoid breathing vapours, keep products off the skin, and use suitable gloves or other protection where instructed. Ordinary workshop familiarity is not a substitute for knowing what the particular product requires.
We should also keep food, drinks, children, and pets away from the work area. If a product contacts the skin or eyes, follow its label directions and seek appropriate help when required. Good ventilation and sensible protective equipment make the work more comfortable as well as safer.
Keeping notes so the next project starts smarter
A short finishing record can save hours later. Note the timber, sanding sequence, product, colour, sheen, application method, coat count, and anything surprising about drying or repair. We do not need a laboratory notebook; a dated card kept with the project photographs is enough.
Our future selves will appreciate knowing why a certain sample worked and another did not. Over time, these notes turn wood finishing basics from a collection of anxious guesses into a reliable personal process: prepare carefully, test honestly, apply lightly, and give the surface time.